Be our facebook's fan page!

Monday, January 30, 2012

Facebook Launches New Timeline Apps

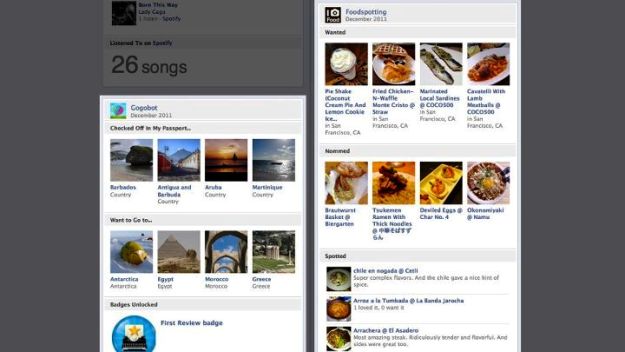
Facebook is getting better and better. During Facebook's live press event last January 18, the social media mogul announced its new 60 Open Graph app partners. The new set of partners, ranging from food to fitness and from travel to lifestyle, will be working closely with Facebook in approving new apps for the platform. This should elevate Facebook to a whole new different level. According to Facebook, the new apps will give way for greater expression of activities among its users, needless to say, better collaboration and communication as well.
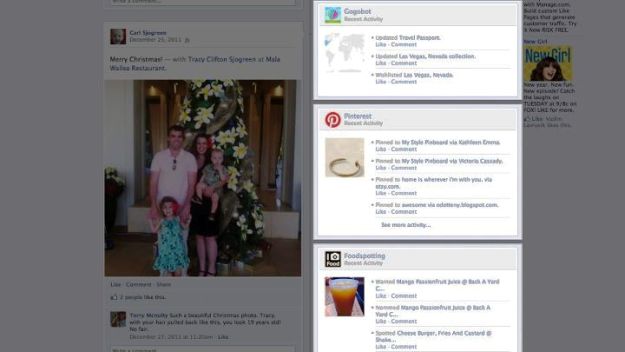
Last year, Facebook laid down its roadmap for 2012 when CEO Mark Zuckerberg said, “The next five years will be defined by the apps and the depth of engagement possible.” If all goes well, marketers and brands will find more opportunities to engage the vast number of Facebook users in the web. Some of the apps available today are Foodspotting, Foodily, Ticketmaster, Pinterest, Rotten Tomatoes, Pose, Kobo, Gogobot, TripAdvisor and many more.
Eddie O'Neill of the Facebook team said, “Starting today, developers can build apps that let people add anything they love to their Timelines - whether it is eating, traveling, shopping, running or taking pictures. The apps launching today are just starting to demonstrate the types of self-expression that are possible with the Open Graph. There are many more stories to tell and great apps to tell them. Get started today!”
The new apps will be shown in the Timeline of every user. At the bottom of the Timeline section, the summaries to all of your app activities per month will be shown. So if you are on Timeline now, you can start adding the apps right away. Currently, there are over 60 Timeline apps in Facebook and they are all there for your taking. No need to worry about compromising your privacy though. Facebook guarantees that you can choose when to add a particular app and when to see it. Once an app is added, you will always have the option to remove posts and notifications directly from your Timeline via the settings option from the "Activity Log". So, what are you waiting for? Start adding the Timeline apps now.


You can like our Facebook page , add us to your circle on Google+ or follow us on Twitter to keep yourself updated on all the latest from any gadget product!

Sunday, January 29, 2012

How To Update to iOS 5

Upgrading to iOS 5 is a easy task and you just need to connect your device to the PC and check for updates.If you are unsure on how to update your device to iOS 5 here are the simple steps to update to the latest OS from Apple.
How To Update to iOS 5 Through iTunes
Step 1: Connect your device to iTunes using the USB cable.
Step 2: Once iTunes has detected your device, click on the device name in the left hand menu and click on the “Check for Update” in the device description box.
download_ios5
Step 3: Apple will show you a popup message as seen above if an update for your device is available. Click on the “Download and Update” button.
Step 4: Apple will download the iOS 5 update and install it on your device. It is important that you DO NOT disconnect the device from the computer during the process. It is also recommended to keep your computer plugged in to the power outlet during the process.
That’s it. The process might take around 10-30 minutes depending on how long it takes to download the update to your computer and install it. Once iOS 5 is installed, iTunes will sync your device and you can use it again.
How To Update to iOS 5 Manually
In some cases, the iTunes update process might not work for you for several reasons. In those cases, you can also update your device to iOS 5 manually. Here are the steps to manually update your device to iOS 5.
Step 1: Download the iOS 5 IPSW file for your device using the iOS 5 IPSW direct download links.
Step 2: Connect your device to the computer using the USB cable and wait for iTunes to detect it.
Step 3: Once your device has been detected – follow the steps given below for different OS.
  • For Windows – Hold the Shift key and then click on the “Check for Update/Update” button.
  • For Mac OS X – Hold the Option key and then click on the “Check for Update/Update” button.
Step 4: In the next dialog browse to the file that you downloaded from Step 1 and select the IPSW file.
Step 5: iTunes will now use the IPSW file and update your device to iOS 5. The process should take around 10-20 minutes.
Troubleshooting
If you are receiving errors updating to the official iOS 5 firmware you can try these troubleshooting steps (Try them one at a time… not all at once):
Note: If you are receiving “An internal error occurred.” (3200 or 3004) this means Apple’s servers are to busy to deal with your restore request. Try again later.
  • Switch USB ports (try USB ports at the back of your computer if applicable).
  • Restart your computer or try an alternative computer.
  • Put your iPhone, iPod Touch or iPad into DFU mode.
  • Download TinyUmbrella , launch it, go into the advanced tab, disable Set Hosts To Cydia, and start TSS server.
I hope this has helped people update to the iOS 5 firmware. I have tried to cover everything possible. If you still need help, however, please leave your questions in the comments section below

You can like our Facebook page , add us to your circle on Google+ or follow us on Twitter to keep yourself updated on all the latest from any gadget product!

Monday, January 23, 2012

Khmer Font For iOS 5.0/5.0.1 (.DEB)

 Here is the link to download Khmer Font for iDevice:

Khmer Font For: iPhone/iPod/iPad

KeyBoard For : iPhone/iPod

KeyBoard For : iPad

Note: Font must install first then keyboard!

Click Here to know more about how to install .deb into your iDevice!

Update:  New version is out 1.0.2

Here is Khmer Font for: iPhone

             Khmer Keyboard: iPhone

You can like our Facebook page , add us to your circle on Google+ or follow us on Twitter to keep yourself updated on all the latest from any gadget product!
Sunday, January 22, 2012

How to Manually Install DEB Files

How to Manually Install DEB File

While Cydia is a decent hub for all of the available jailbreak apps and utilities, there’s no arguing that dealing with the clunky package installer can be a bit cumbersome at times.
For folks that weren’t aware, you can manually install jailbreak apps and tweaks without ever opening Cydia. All you need is the .deb file of the package you want to install, and an FTP client like iPhone Explorer or Cyberduck
It’s fairly likely that you’ve come across one of our posts in the past that discussed a tweak or app that wasn’t in Cydia for one reason or another. In this case, some developers provide a link to a downloadable .deb file.
Placing this file into the correct folder on your iDevice will automatically install the package, bypassing Cydia. This allows for much quicker package installations, and enables you to install multiple items (like themes) at a time.
This guide assumes you know how to SSH into your iDevice. If you need a refresher, check out our easy SSH tutorial.
Step 1. Launch your SFTP client (I’m using Cyberduck) and login. Navigate to/var/root/Media on your iDevice. If you don’t already have a Cydia folder there, make one.
Step 2. If you already had a Cydia folder, open it and find the AutoInstall folder. If you didn’t, just open your newly made Cydia folder and create another new folder entitled AutoInstall.
Step 3. Locate the .deb file(s) you’d like to install and place them in the AutoInstall folder. Once copying is complete, restart your iDevice — twice. After the 2nd restart, the new packages should show up on your springboard and in Cydia.
That’s all there is to it! The cool thing is, with apps like iFile, you can do this all on your phone with no need for a computer. Imagine having a .deb file for every one of your favorite packages, restoring would take a fraction of the time.
Spurce iDB

Saturday, January 14, 2012

How to Enable AutoCorrect Bar on iPhone, iPad, iPod Touch

This feature works through creating a bar on the top of the keyboard screen that shows you different corrected options for the words that you are writing in your text and these words comes down alphabetically for you to choose the right option.

The devices that are supported by Autocorrect bar:

  • iPhone 4S
  • iPhone 4
  • iPod touch 4
  • iPad 1
  • iPad 2

enable autocorrect bar 

How to Enable Autocorrect bar on iPhone, iPad, iPod Touch?

  • Step1- Connect the idevice that you have to the itunes and make a backup
  • Step2- Download the application for the backup “ibackupBot- windows and mac” and install it on your computer
  • Step3- Now comes the step where you choose your idevice from the list that appears on the left hand panel in the backup app
  • Step4- Navigate to library/preferences/com.apple.keyboard.plist and then double click on the file to open
  • Step5- Add the following key<key>keyboardautocorrectionlists</key> <string>YES</string>
  • Step6- Close this file and then save it
  • Step7- Now click on the restore icon in order to restore the backup file
  • Step8- Your idevice now is going to restart.
Now you have your autocorrect bar enabled


You can like our Facebook page , add us to your circle on Google+ or follow us on Twitter to keep yourself updated on all the latest from any gadget product!