Be our facebook's fan page!

Saturday, May 21, 2011

Take Screenshots on Android Phones And Honeycomb Tablets With Screenshot ER

Taking screenshots on Android phones and tablets has always been a pretty jumbled up issue. I do remember the time when taking a screenshot on my HTC Wildfire was actually real-time tinkering and hacking with my Wi-Fi network etc. However as development for Android gathers pace every day, there is now an app available that not only takes screenshots on your phone / tablet but also allows saving images in PNG or JPEG formats. The app under discussion is Screenshot ER for Android and according to its developer, ftgg99 from XDA, “ER is for emergency room, because it works where nothing else does”.
The main features of Screenshot ER app for Android are:
  1. Take Screenshots Of Your Current Screen With Shake, Delay And Icon-Tap Gestures
  2. Save These Screenshots in Form of a PNG or JPG file On Your SD card.
  3. Share Your Screenshots In Real Time With Picasa, Dropbox Or Any Other Image Supporting / Sharing App That You Have Installed On Your Device.
Like all other handy Android apps, I took this one to test on my HTC Wildfire and Huawei Ideos. The first major drawback that I found after downloading and installing Screenshot ER was its non compatibility with unrooted or stock Android devices. Screenshot ER requires you to have root on your device and if you don’t, then a better option will be to go for Screenshot It app from Market. Screenshot It was found as working OK for many Android devices but was a total failure on handsets with smaller screens like Huawei Ideos.
Coming back to the topic, installing and setting up Screenshot ER for Android is really simple. All you need to do is launch Android Market and run a keyword search “screenshot ER”. But as it’s a paid application, so you also have an option to get it free from XDA forums.
Here is how you can manually install Screenshot ER on your Android phone / tablet:
  • The first step is to download Screenshot ER from XDA forums thread here. Please remember that you will need to be a XDA member to download this donate version. I highly encourage you to donate if you find this app useful.
  • Once you are done with downloading the APK, connect your phone to the computer and mount SD card as disk drive.
  • Now copy the downloaded APK to SD card root.
  • Once done, disconnect your phone from the computer.
  • After this download Astro File Manager from market and install it on your phone.
  • Once the installation is complete, launch Astro File Manager and tap on SD card on main app screen.
  • Once in the SD card, navigate down to fahrbot.apps.screen-1.0.8-(r9)-xda-ver.apk and tap on it to install.
  • Now after the installation completes, you will have Screenshot ER donate version installed on your device.
How To Set up Screenshot ER:
So onne you have installed Screenshot ER on your device, tap on the app’s icon in home screen.
First time launch will ask you for Super User Permissions, tap on Allow.
Now the main app screen will show you these options:
  • Enable Service
  • Snap On Shake
  • Snap On Notification Icon
  • Snap Icon Delay
  • Take Screenshot Now
  • Screenshot Delay
  • Create Home Screen Shortcut
  • Storage Folder
  • File Format
  • Play Sound
  • Debug
We will only be discussing some of the useful options while you can checkout and test others yourself:
You need to tap on the check box in front of Enable Service to let the application take screenshots. After this it’s up to you if you select Snap on Shake or Snap on Notification Icon. Other options like Take Screenshot Now and Screenshot Delay lets you toggle immediate screenshot capture or to delay it by a couple of seconds. The easiest way to take a screenshot with this app is to first go to app > enable services > Snap on Notification Icon. You will now be able to see a small camera in notification bar. Once you drag the notification bar down, you will be able to take screenshots on your device by tapping on “Tap to Take a Screenshot”.
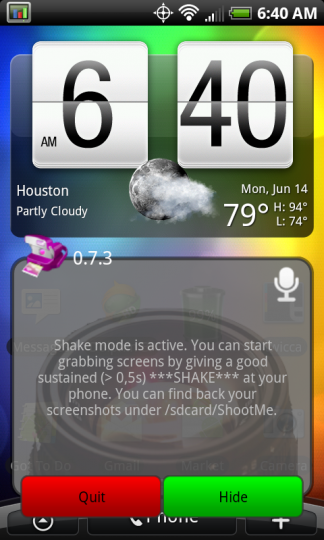
Once you take a screenshot, it will take some time to get processed. And after the processing is complete, you will be given options like Share, Discard and Save from within the screen. Please note that before saving your screenshot, you must define a location on SD card by using the Storage Folder option in main application. By default, Screenshots are saved in JPEG format in Screenshot ER folder of your SD card.
Here are some screenshots that we took on our HTC Wildfire with this app:
Screenshot Android Phone Screenshot Android Phone
Screenshots Er In Action On Huawei Ideos:
Screenshot Android Phone Screenshot Android Phone
As I didn’t test this app on any Android tablet, so here are some sample screenshots from app developer:
Screenshot Android HoneycombScreenshot Android 
Honeycomb (1)
All in all, Screenshot ER is a fantastic screenshot app for your Android device regardless of screen size or genre. You can use it flawlessly on small screened Android phones to 10.1 inches

Screenshots on Android 2.3.3 and Above No Longer Requires Root Access

One feature that we all have come to love on iOS devices is the ability to take screenshots natively, without having to jailbreak, or install any third party app.
On the other hand on Android phones, taking screenshots has always been a pain. It requires you to root your device, and then get this functionality either via custom ROM, or by using a third-party app.
Screenshot 
on Android
But now, starting from Android 2.3.3, you are no longer required to root your device just to get the screenshots functionality. The wait is now for the third party apps to use the new APIs present in Android 2.3.3 Gingerbread SDK to take advantage of this new functionality.

Fix iTunes Error 3194 When Restoring / Updating To Stock or Custom 4.3.3 Firmware

Just like how it was when iOS 4.3.2 was released, it seems like some iPhone users are having trouble when restoring their device to either stock, or custom iOS 4.3.3 firmware.
Turns out, if you have changed your system’s host file to point to Cydia’s SHSH caching server (possibly for downgrading purposes), you wont be able to restore/update to iOS 4.3.3. iTunes throws Error 3194:
iPhone42
The iPhone could not be restored. An unknown error occurred (3194).
This is apparently due to a bug in Cydia’s backend which should be fixed soon.
Temporarily, you can fix this by removing Cydia’s SHSH caching server from your host file. This can either done manually by removing Cydia’s IP address from your system’s host file, or by simply using TinyUmbrella, instructions for which are as follows:
Step 1: Download the latest version of TinyUmbrella for Windows or Mac.
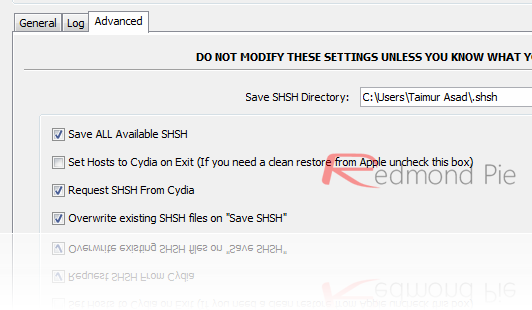
Step 2: Switch to “Advanced” tab and uncheck “Set Hosts to Cydia on Exit” option.
TU
Step 3: Click on “Apply Changes”, followed by restarting your PC or Mac.
That’s it! You should now be able to successfully restore or update your iPhone to iOS 4.3.3 firmware